 Beckie's Kitchen
How to Cook Quinoa on the Stove
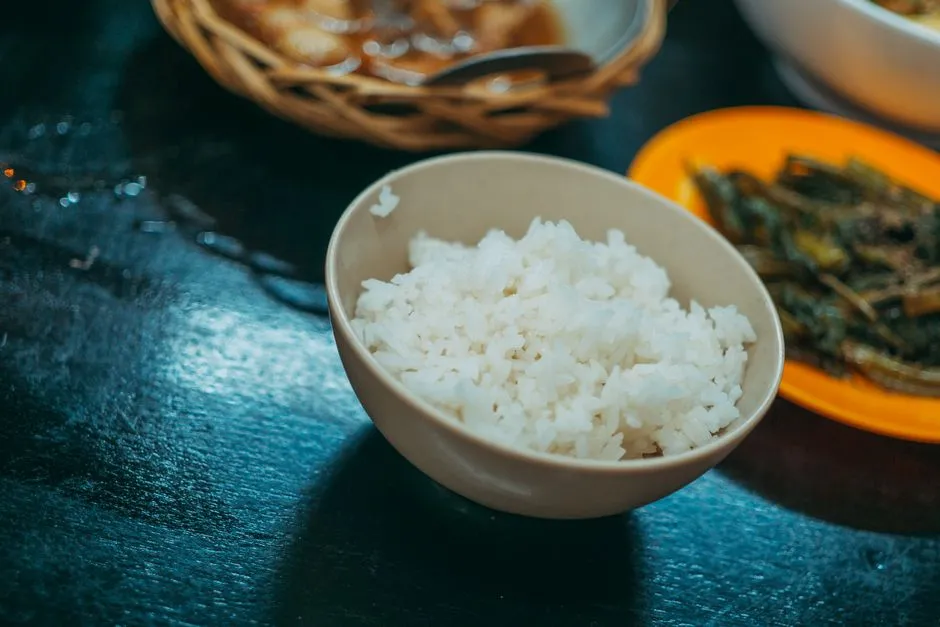
- The dependable stovetop method
- Ingredients and equipment
- Should you rinse quinoa first?
- How to cook quinoa on the stove, step by step
- Optional: toast the quinoa before adding liquid
- How to scale the ratio without changing it
- Why is my quinoa still wet?
- Why is my quinoa firm or dry?
- Why does quinoa taste bitter or turn mushy?
- How to serve it
- Cooling, storing, and reheating cooked quinoa
- The short version to remember
- Sources
The dependable stovetop method
For fluffy stovetop quinoa, use 1 cup quinoa and 2 cups water or stock. Bring the liquid to a boil, add the quinoa, cover, reduce the heat, and simmer for about 12 minutes, until the liquid is absorbed. Take the pan off the heat, fluff once, cover it again, and leave it alone for 15 minutes. That covered rest is part of the method, not an optional delay.
Those amounts and times follow the current label instructions for Bob's Red Mill Organic Quinoa Grain. Check your own package before starting. A blend, a pre-cooked product, or quinoa sold with different instructions should be cooked according to that package rather than forced into this formula.
Measure the liquid instead of estimating it, and keep the lid on during the covered cooking and resting stages. Lifting the lid releases steam.
Ingredients and equipment
For four portions, gather:
- 1 cup dry quinoa
- 2 US cups water or stock (about 473 milliliters)
- 1/4 teaspoon fine salt, optional; use less or omit it if the stock is already salted
You also need a fine-mesh strainer, a 2-quart saucepan with a well-fitting lid, measuring cups, and a fork. Quinoa can pass through an ordinary colander.
Water gives you a neutral batch that can move into breakfast bowls, salads, or dinner. Stock makes the quinoa savory from the start. Both behave as the cooking liquid in the same 2:1 formula, but a salty stock changes how much extra salt the pot needs.
Should you rinse quinoa first?
Read the package. Some quinoa is sold pre-rinsed, while bulk quinoa may still need rinsing. Colorado State University Extension specifically advises checking the package and rinsing quinoa bought in bulk. The rinse removes the bitter-tasting surface coating described by the extension as saponin.
To rinse, put the measured quinoa in a fine-mesh strainer and hold it under cool running water. Move the quinoa around with clean fingers so the water reaches the whole measure, then let it drain thoroughly. The extension's bowl method is another workable route: cover the quinoa with water, rub it gently between your hands for a few seconds, drain through a fine mesh, and repeat once.
If you are also preparing raw meat, poultry, seafood, or eggs, keep them and their tools separate from the quinoa and ready-to-eat ingredients.
How to cook quinoa on the stove, step by step
1. Check, measure, and rinse if needed
Check the quinoa for any stray debris, especially if it came from a bulk bin. Measure 1 level cup. Rinse it if the package calls for rinsing or if it was bought in bulk, then drain it well. Measure 2 level cups of water or stock separately. Measuring both before the burner goes on keeps the ratio intact.
2. Bring the liquid to a real boil
Pour the 2 cups of liquid into a 2-quart saucepan and bring it to a boil. Add the quinoa and optional salt, then wait for the liquid to return to a boil. Give the pan one stir to distribute the quinoa evenly.
3. Cover and lower the heat
Put on the lid and reduce the heat to maintain a gentle simmer. The liquid should continue cooking, but it should not pound against the lid or spit from the rim. On many stoves that means low or medium-low, not one universal dial number.
Set a timer for 12 minutes. Resist repeated stirring. Quinoa does not need the constant movement of a risotto, and opening the pan lets steam escape.
4. Check absorption, not just the clock
At 12 minutes, look through the lid if you can. Tip the covered pan slightly: liquid should not run to the low side. If a shallow pool remains, cook covered for another minute or two, then check again.
If the pan smells toasted before the timer ends, remove it from the heat immediately and check the bottom. That points to heat that was too high, a loose measurement, or a lid that let too much steam escape. Do not continue heating a dry pan simply because the timer has time left.
5. Fluff, cover, and rest for 15 minutes
Take the pan off the burner. Run a fork through the quinoa once to loosen it, replace the lid, and let it stand for 15 minutes. Bob's Red Mill includes this covered rest in its label method. It gives remaining moisture time to distribute without more direct heat.
After the rest, fluff from the bottom with a fork. Taste before adding more salt. The quinoa should be tender rather than hard in the center, with separate seeds rather than a wet layer underneath.
Optional: toast the quinoa before adding liquid
Toasting is useful when you want a more pronounced roasted aroma, but it is not required for fluffy quinoa. Colorado State University Extension instructs cooks to heat rinsed quinoa in a pan for 4–5 minutes before adding the liquid. That step evaporates water left by rinsing while warming the quinoa's natural oils.
Drain rinsed quinoa especially well, place it in the dry saucepan, and cook it over moderate heat for 4–5 minutes while stirring frequently. Once the surface moisture has evaporated and the aroma becomes nuttier, add the measured liquid carefully. A hot pan can make the first splash of liquid steam vigorously, so keep your face and hands back. Bring the liquid to a boil, then continue with the covered method.
If you are new to quinoa, make the plain version first so you learn how a finished batch looks in your pan.
How to scale the ratio without changing it
The base ratio is one part dry quinoa to two parts liquid by volume. Scale both together:
| Dry quinoa | Liquid | Optional fine salt | Approximate cooked yield |
|---|---|---|---|
| 1/2 cup | 1 cup | 1/8 teaspoon | 1 3/4 to 2 cups |
| 1 cup | 2 cups | 1/4 teaspoon | 3 1/2 to 4 cups |
| 1 1/2 cups | 3 cups | 3/8 teaspoon | 5 1/4 to 6 cups |
| 2 cups | 4 cups | 1/2 teaspoon | 7 to 8 cups |
The yield range comes from scaling Bob's Red Mill's stated yield of about 3 1/2 to 4 cooked cups from 1 dry cup. The salt is simply proportional arithmetic, not a requirement. For a larger batch, move to a larger saucepan so the boiling liquid has room and the quinoa sits in a reasonably even layer.
Cooking time does not scale as neatly as the ingredients. Start with the package time, then judge absorption and tenderness.
Why is my quinoa still wet?
First, distinguish visible water from steam-softened quinoa. If water runs across the bottom when you tilt the pan, cover it and return it to a gentle simmer for one or two minutes. Check again. Once the free liquid is gone, take the pan off the heat and complete the covered rest.
If the quinoa is tender but genuinely soupy, the original liquid may have been overmeasured. Drain the batch through a fine-mesh strainer rather than boiling it until the seeds collapse. Return it to the warm, dry pan, cover, and let it stand off the heat for several minutes.
Next time, measure both ingredients level and do not add an extra splash before cooking. You can add moisture later more neatly than you can remove it.
Why is my quinoa firm or dry?
Firm centers with no liquid left usually mean the pan lost liquid before the quinoa absorbed enough. Add 2 tablespoons of water, cover, and return the pan to the lowest gentle simmer for two minutes. Remove it from the heat and let it stand, still covered, for five minutes before tasting. If it remains firm, repeat with another 2 tablespoons rather than pouring in a large amount at once.
For the next batch, check that the lid fits, the simmer is gentle, and the starting liquid was measured. If your package specifies another ratio or time, use it.
Why does quinoa taste bitter or turn mushy?
A bitter or soapy edge often points to quinoa that needed rinsing. Follow the package, and rinse bulk quinoa through a fine mesh before cooking. Toasting cannot substitute for a needed rinse.
Mushy quinoa usually comes from excess liquid, prolonged cooking after absorption, or aggressive stirring. Measure precisely, stop direct heat once the liquid is absorbed, and use the covered rest to finish the texture. Fluff with a fork instead of beating the pot with a spoon.
For salad, spread the cooked quinoa in a shallow layer after its rest so it stops steaming and cools more evenly. Do not rinse cooked quinoa to cool it; that adds water to the texture you just worked to control.
How to serve it
Season the finished pot for the meal it is joining. For a plain side, olive oil, lemon juice, black pepper, and chopped herbs are enough. For a grain bowl, keep the quinoa fairly neutral and let roasted vegetables, beans, eggs, fish, or chicken provide the stronger flavors. If you want a familiar comparison for managing a covered saucepan and resting the cooked grain, see our guide to cooking rice on the stove.
Taste after cooking. Stock, cheese, sauces, and olives can bring salt of their own. Neutral seasoning leaves a batch useful across several meals.
Cooling, storing, and reheating cooked quinoa
Treat cooked quinoa as a perishable leftover. FoodSafety.gov says perishable food should be refrigerated within 2 hours, or within 1 hour when it has been exposed to temperatures above 90°F (32°C). Put the quinoa into small, shallow containers so it cools promptly; do not leave the whole covered pot on the counter for the evening.
Use refrigerated leftovers within four days, or freeze them within that period. Reheat leftovers to 165°F (74°C), checking with a food thermometer. If microwaving, cover and rotate or stir for even heating, then check more than one place because a microwave can leave cold spots. Discard perishable quinoa that has sat out beyond the applicable time limit rather than using smell or taste as a safety test.
For a better texture, add a spoonful of water before reheating and break up cold clumps. That moisture tip is about quality; the 165°F reheating temperature is the safety endpoint.
The short version to remember
For the named base method, remember 1 cup quinoa, 2 cups liquid, 12 minutes covered at a simmer, then 15 minutes covered off the heat. Rinse when the package calls for it or when buying in bulk. Measure first, keep the lid on, and judge the result by absorbed liquid and a tender center. If your package gives different instructions, its directions win.
Sources
- Bob's Red Mill — Basic Preparation Instructions for Organic Quinoa Grain
- Colorado State University Extension — Keen-What? Quinoa
- FoodSafety.gov — Leftovers: The Gift that Keeps on Giving
- FoodSafety.gov — Safe Minimum Internal Temperatures
Frequently asked questions
What is the water-to-quinoa ratio?
The named base method uses 2 cups water or stock for 1 cup dry quinoa. Check your package first and use its directions if they differ.
Do I have to rinse quinoa before cooking?
Check the package. Some quinoa is pre-rinsed, while Colorado State University Extension advises rinsing quinoa bought in bulk through a fine-mesh strainer.
How long does quinoa cook on the stove?
Bob's Red Mill's label method simmers quinoa covered for about 12 minutes, until the liquid is absorbed, then rests it covered for 15 minutes off the heat.
How do I fix quinoa that is still wet?
If liquid remains and the quinoa is not yet tender, cover and simmer for one or two more minutes. If it is already tender and soupy, drain it through a fine-mesh strainer and rest it covered in the warm pan.
How long can cooked quinoa stay in the refrigerator?
FoodSafety.gov says to refrigerate perishable leftovers within 2 hours and use or freeze them within four days. Reheat leftovers to 165°F (74°C).